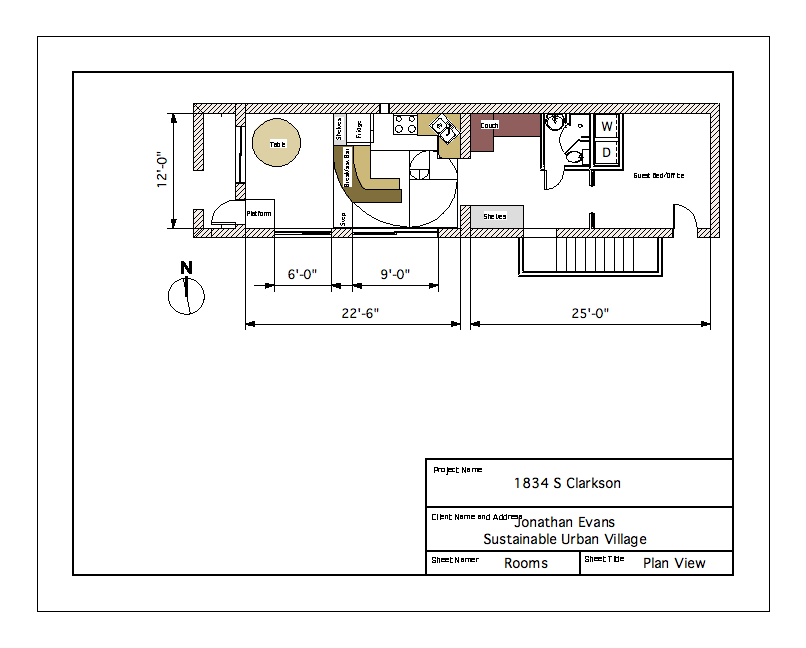
EcoEnovation - Denver

This blog is intended to document a proof of concept renovation project in Denver that demonstrates the economic benefits of green building. Economic prosperity through ecological wisdom.

Wednesday, December 20, 2006

Home Stretch

Happy Holidays!

We awoke to a Front Range Blizzard this morning that swirled up from the Gulf of Mexico to dump up to two feet of plump, puffy, powder on the Colorado capital... Hey, A little bit of alliteration never nusanced no one.


So after doing a little shoveling and grabbing a Duffy roll, we buttoned in to finish hanging drywall, fire off a blog entry, and enjoy the warmth of hydronic radiant heating flowing beneath our feet.

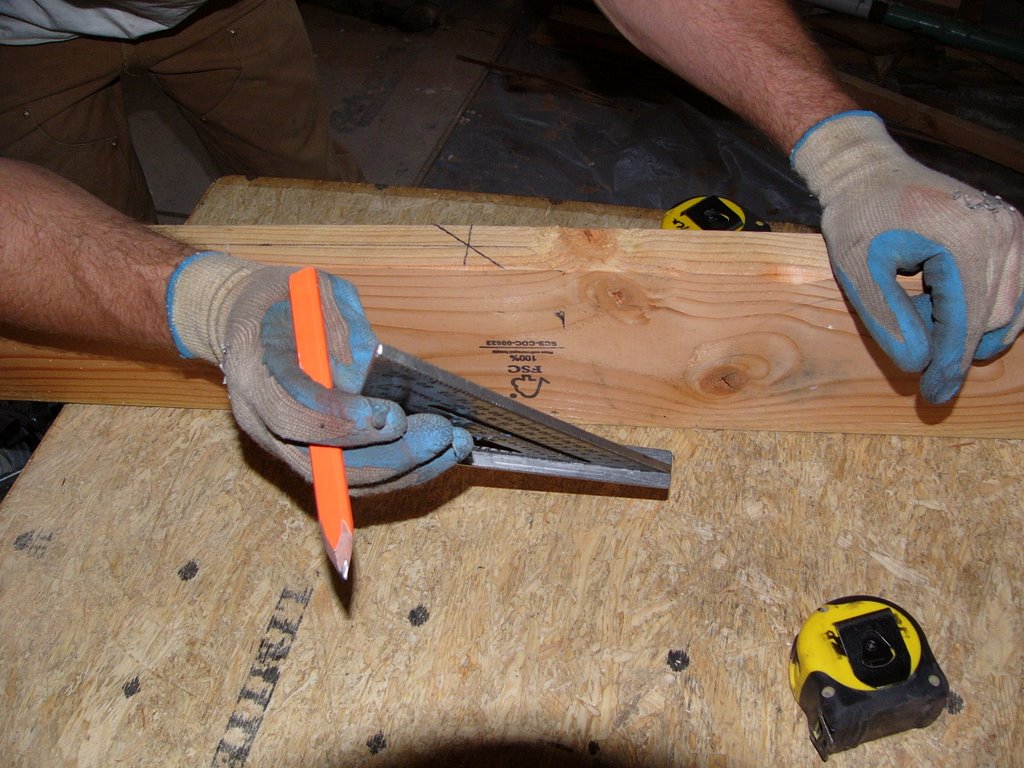
Zach and I have been joined for the last month by our old friend Brandon from college. Brandon is the funny looking guy with the "Del Soto Bail Bonds" sweatshirt holding the tape. Brandon just got out of the Army in September, went on a little road trip, and got married to his wife Larisa for the second time down in Costa Rica (it has been observed that lots of Army couples elope). He arrived in the mile high city in Novemeber and became the company's first payroll employee.


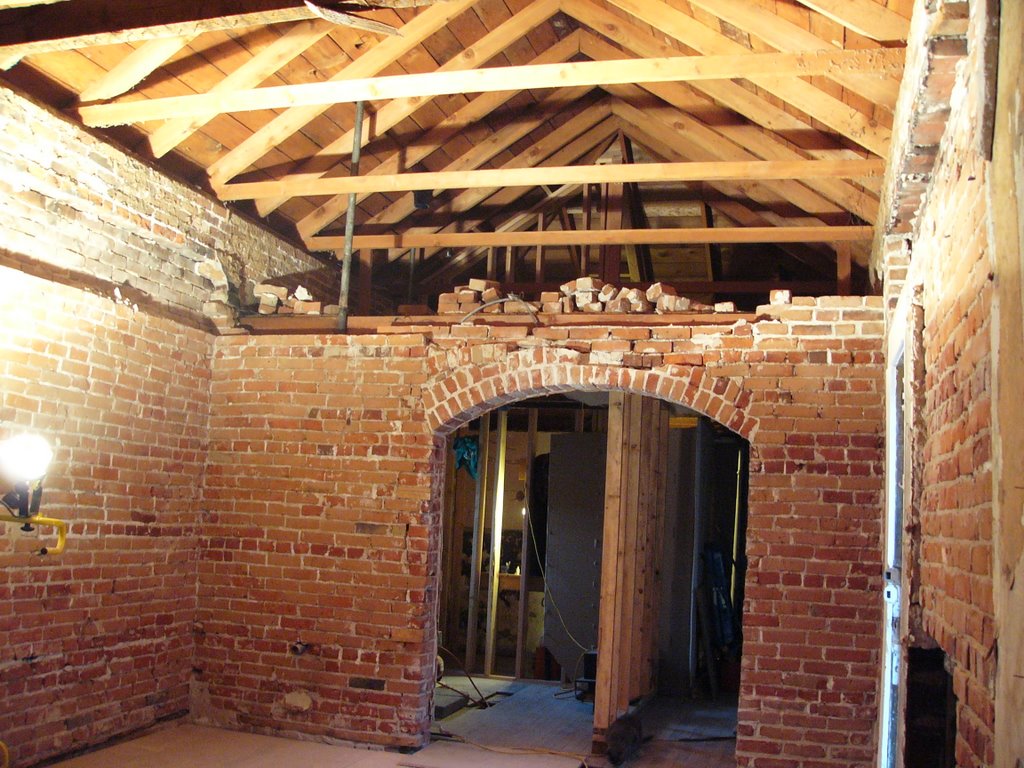
Brandon's arrival to the team has been motivating. We've powered through buttoning up the bathroom, finishing and staining the concrete slab, insulating the entire house (we used among a few other kinds of insulation a product called "Ultratouch" made from recycled Blue Jean Cotton), sealing air leaks with foam, and lofting the kitchen ceiling (a massive task worthy of a special nod from the guy who worked on the computer while Brandon and Zach magically built another little house inside this little house). We passed our final rough electrical inspection last week and have been hanging drywall ever since. Lights, switches, a shower, a toilet, heat, and a few clean surfaces to look at! Now for the custom bamboo cabinets being crafted by our friend and neighbor Martin Shea, an esteemed, local cabinet maker who's really helped us out.


The concrete slab went in a few weeks ago, and its four inches of thermal mass store the heat of the hot water running through the tubes to provide a smooth-feeling, long-lasting, and highly-efficient form of heating. The biggest efficiency comes from how this heating system interacts with the people that live in the home. Radiant in-floor heating is designed to warm the occupants of the room, rather than the room itself. Hot water running through the tubes radiates heat directly into the your feet and warms the body from the inside rather than having to force hot air to warm the body from the outside through a pretty thick skin (in some).

The heat is provided right now by a Nortitz "on-demand" type water heater that's capable of providing up to 193,000 BTUs at up to 5 gallons per minute. This little guy (it's a 2'x3' box that mounts on the wall) is impressive! It provides enough hot water to heat the floors and take care of all the domestic hot water demands. The best part is that there aren't 60 or 80 gallons of hot water down there constantly dissipating heat and constantly needing to be warmed up again wasting fuel. This Noritz only kicks on "on demand", thus representing a huge efficiency in energy use.

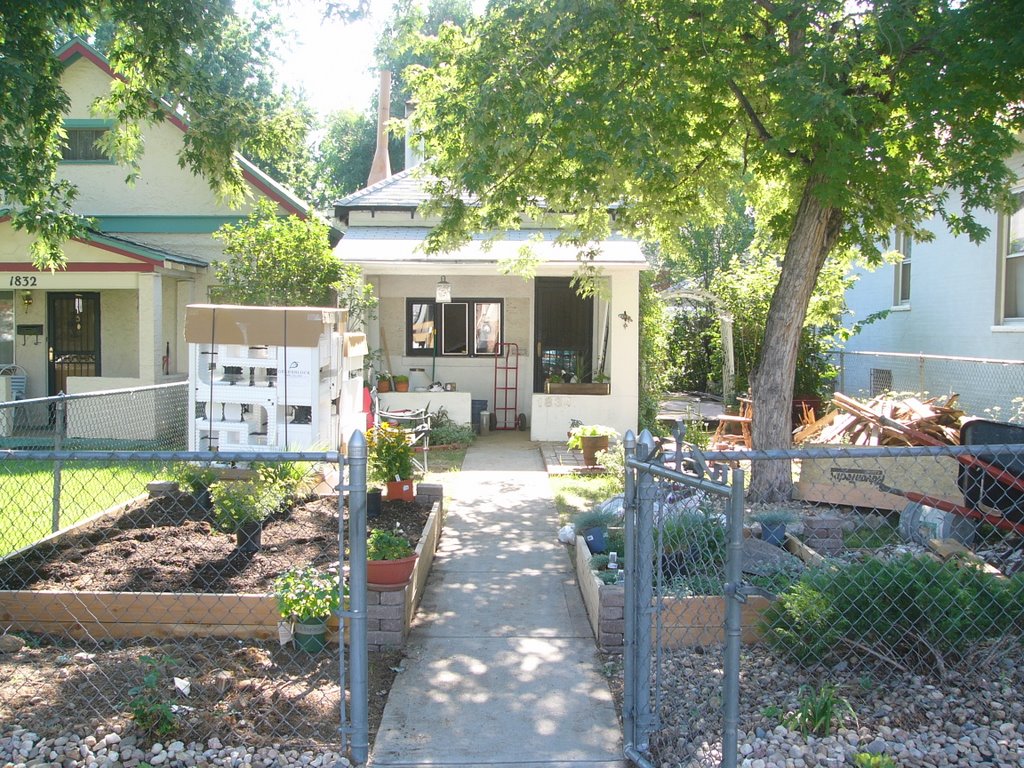
Things are looking good here at the bungalow. She's starting to show her beautiful face. Now we just have to dress her up for the ball.

Thursday, November 09, 2006

A floor that shares heat.


Hanna typing: One of the biggest undertakings of the project has been achieved. After months of working on preparation for our radiant floor installation all the pieces finally came together a couple of weeks ago. Jonathan spent close to a week under the floor joists of two rooms installing the plastic tubing amidst dirt and limited space. Later, Zach helped install the tubes over a metal mesh grid that held them in place in what is to become the dining room and kitchen. When they were done the floors looked like an amazing art installation piece, ready for presentation in any contemporary art museum!


Today the achievement in the house is even greater. Two weeks ago concrete was poured over the tubes and mesh and tubes in the soon to be dining room and kitchen. A dark charcoal grey was chosen for the floor--this is a color that will show off both the tone of the to-be installed cabinets and the exposed brick that has been unearthed in these two rooms.

A powerful heat system has been purchased and is now running. The house is heated from the floor up, and it is warm and cozy even on the second floor.

We are now working on pouring a concrete wall in the bathroom and tiling two of the walls with some beautiful gray slate. High-efficiency Daphne plumbing fixtures have been purchased and are soon to be installed.

The days are shorter now here in Denver but they are still filled with excitement and progress at 1834 S. Clarkson Street.

Thursday, September 21, 2006

mid september

Zach typing: greetings from sunny colorado. we've had our first snow up in the high country!! the mountains are snow capped but it still feels like summer down here in Denver. i'm fresh back from a surf trip to baja, and jon really came through while i was away. i returned to find the radiant floor system design complete as well as a friendly electrician added to our team. Good help is hard to find, and we are now poised to execute all of the plans we've been setting up for the last month.

These are the most recent pictures from in the house.

you can see we removed the ceiling above the kitchen to expose the vaulted roof to the ridge, and the brick arch has been repaired. the natural wood will not be featured in the final design because we need to add framing and drywall to create space for insulation. We will create an 18 inch recess with this framing that we will fill with cellulose to give the roof an insulation value of R-60. To give you an idea, most houses have a roof insulation value of R-40. We are utilizing this beefed up insulation to capture the energy from the radiant floor and keep utility costs to an absolute minimum.

we are getting very excited now that all of our prep work is beginning to position us to reach a few milestones. The radiant floor will be complete in the next two weeks with the rough electric finishing right behind. we then move directly into finishing the bathroom and beginning construction of the kitchen cabinets. check back next week and we'll have some pictures of the radiant system equipment and a visual of the final prep for the radiant floor in the kitchen and dining room. write us a note and ask us some questions because i'm sure i've left something out. see you later

Thursday, August 17, 2006

Vaulted Kitchen Ceiling

zach typing: hey there, sorry for taking so long to get this blog up. fortunately we havn't forgotten to take some pictures while we were down in the trenches doing some things worth blogging about. We've made some serious headway since the last entry. As of today we have taken out the kitchen ceiling and made room for a vaulted ceiling. below, you can see the joists just before we cut them out. last week we moved the bathroom and vaulted the ceiling above the new shower. above is a picture of me laying out one of the hip joists for the new ceiling.
here is a picture of the scrap yard where we recycle the iron, brass, aluminium, and copper we take out of the house. This way we keep the scap metal out of the landfill and get to add a few dollars to the coffer as well.
another shot of me laying out the new bathroom ceiling. We've designed the bathroom with a slanted twelve foot high ceiling with a sun tube to allow for some natural light. stay tuned for more pictures as this promises to be one of the hottest bathrooms in the neighborhood.
after a long day we like to take advantage of the beautiful weather here in colorado, and there's no better way than a plate of brie and french bread served up in the garden. come on over and enjoy the scene-hope to see you soon!


a picture from above the kitchen before we deconstructed the planks and cut out the joists. all of the wood here is being reused on-site for bracing and miscelaneous framing. it takes longer to drive to the lumber yard than it does to pull out the nails.

Saturday, July 29, 2006

Updated Floorplan


This is an updated picture of the floor plan. Zach and I have been grinding through the utility cellar and have thoroughly enjoyed working with the greenblocks and will soon be working above ground on forming the finished concrete slab. Mike, our engineer, came up with the great idea to pour our 4" insulated radiant slab directly on grade rather than suspending it on joists above a problematic, building-code intensive crawl space. Not only does this save resources mostly in the form of lumber, but it also allows us to raise and lower the final floor elevation without any more effort than what it takes to shovel the dirt (which is just a free workout as far as we're concerned). So we've opted to lower the dining room floor height about 7" below the kitchen floor height while finishing both surfaces and the step between them in polished and dyed concrete. The idea is to "compress" anyone entering the house when they stand on the entry platform so that the full effect of a ten foot ceiling in the dining room can be contrasted before stepping down.

The breakfast bar will act to divide the space between the dining room and the kitchen in an open floor plan concept. The diffierent elevations will allow for a nice, tall bar for visitors to saddle up to from the dining room side while also providing a sizeable countertop workspace for whoever is cooking. We designed the bar to follow a curve based on the Fibonacci sequence, a natural pattern that occurs in nature countless times in forms like a nautilus shell or a fern. We worked this into the design to give a nod to the concept of biomimicry - the idea of using nature as an ecological standard to judge the "rightness" of our innovations. After 3.8 billion years of evolution, nature has learned what works and it is our belief that such an intricate blueprint leads to aesthetic beauty.

Saturday, July 22, 2006

Onward and Upward


This is a picture of the lowest point we will reach in the renovation. Yesterday, Zach and I mixed 30 bags of concrete and poured this 8"x16" reinforced concrete footing. These first 8 inches of upward progress will support a 6 foot ICF wall (Insulated Concrete Form), and a 4" concrete slab to be formed and poured in the coming week.

Zach and I are enthused to try out a relatively new and emerging green building product in the form of our ICF utility cellar.
ICFs are made from expanded polystyrene (EPS - same stuff they make Styrofoam coffee cups out of), but they represent a huge energy savings with insulating values of up to R-50, and provide amazing strength with a perfect and continuous reinforced concrete form. EPS is not our favorite green insulator considering some of the biodegradeable alternatives (recycled cotton, recycled newspapers, soy, and straw to name a few), but EPS has come a long way.


We chose a company called Greenblock, whose simple leggo-like assembly system, high R-values, and handy embedded furring strips made for a perfect combination. Additionally, although Greenblock is a world-wide manufacturer that has been used as a standard European building system for over 30 years, they have a small local distributor in Woodland Park. Zach and I were pleased to be greeted by a professional and friendly old hammer swinger named Jeff who graciously agreed to hang out and wait for us after hours to sell us the meager two-bundle order we were requesting. We were treated to a full introductory class in Jeff's office and later followed it with a quick wall building tutorial in the warehouse. We certainly didn't feel like we were dealing with a multi-national corporation. Jeff made it easy for us to choose Greenblock, and we hope to host him for an ICF class in Denver on our next project this fall.


The ICFs, which come in 4'x1'x11.25" blocks, will be stacked like a brick wall on top of our new concrete footings at the bottom of the cellar and braced with standard framing lumber for support. We will then pump 4000 psi concrete with a mixture of %20 fly-ash (to replace some of the Portland cement - a diminishing resource in increasingly high demand as China and India pour more concrete foundations and walls than we can imagine) into the bottom of the forms and fill them like a pudding cup. It's a clever and elegant system. We're excited to move forward.


This is a huge project for a two person crew, and at times it can get a little daunting. Fortunately, our requirement to recycle or reuse no less than 75% of the waste materials from the project has facilitated the building of a few morale boosters in the form of landscaping. In order to collect the rubble and dirt from our demolition, we built outdoor planter boxes out of FSC-certified (Forestry Stewardship Council) 2x6s and brick posts. The boxes we've built so far have provided a need for over 10 cubic yards of landscaping fill. The rest we take to recycling facilities first, and landfill last. I'm proud to say that we've only taken three trailer-loads of waste to the landfill so far, and I feel confident we will make our goal of 75%.


Now that the boxes are filled, Hanna and Malin have started to gather a collection of beautiful native grasses, shrubs, and flowers and have started to implement a drought-resistant and low water use landscape design. The house is whirring with a wonderful feeling of progress. Although it may look like a bunch of vagrants and hippies are camping out waiting for Phish tickets, this EcoEnovation is in full swing, and before we know it, it will be time to dress her up and present her to the neighbors. Until then, we persevere!

Saturday, July 08, 2006

Back to Work


Hanna and I have just returned from the East coast where we had a wonderful hiatus from the tasks at hand awaiting us in Denver. Work resumes next week with the arrival of our old friend Zach from San Diego. Zach is a proffessional carpenter, a surfer, and a journeyman who has graciously offered us the better part of his summer to join us in building the "EcoEnovation". With his help, we hope to quicken the pace as we move from the demolition and deconstruction phase into the rebuilding phase.

We will start by first building Zach's and Hanna's sister Malin's sleeping quarters in the garage. I like to call the garage (which is unrealistically small for our Outback) our new "bunk house". The EcoEnovation is turning into a real barn building party with friends and relatives passing through Denver all summer, and with the house in a constant state of flux, accomodations are limited. The garage is clean and dry with electricity and is therefore a perfect candidate to provide a bunk house to our transient guests. We've also placed our new refridgerator in there with our microwave on top rendering the space into a rustic kitchen. There are two tiny tiny rooms adjoining the main bay of the garage that could be used as a mud room or utility closet, but instead, we will install a few sleeping platforms to constitute what Malin calls the sorority and the fraternity house.


There is a small 5 foot wide outdoor corridor between the garage and the house that we have transformed into an outdoor hygiene facility. With the help of my good friend Adrian, we installed a custom door and frame to form the corridor into an outdoor room. The door was composed of deconstructed floor joists and 2x4s, sheet metal from the old air ducting system, and a series of beautiful cedar slats recovered from one of the many floor decks we removed. Inside the private space created we have placed a solar shower on a pulley system, and set up a dishwashing station in lieu of not having a functioning indoor shower or kitchen. We love the solar shower so much, we've decided to add a permanent outdoor shower to the plan.


After completeing the bunk house and moving Zach and Malin into it, we will rip the rest of the floors and framing out of the 1st floor. We need to have the entire inside gutted down to the dirt below the old rotting floor joists so that we can bring in our structural contractor to poor two grade beams along the entire length of the foundation. We will then install new floor joists on the new beams inside the old brick foundation and build our radiant slab on top. We're all getting excited to start building upward from a level and square platform. Things are proceeding in style!